今回はCocoaProgrammingで「カスタムビューに図形を描画」させてみようと思います。
NSGraphicsContextを使うことで、四角や丸だけではなく、直線も描画できるようになるので、星のような複雑な図形も描画できます。
そこで今回は、NSGraphicsContextを使って、四角と丸、直線を描画する方法を紹介します。
はじめに
今回紹介する方法は「CocoaProgramming」で、使用言語はSwiftで開発を行っていきます。
また、Xcodeを使ってウィンドウのレイアウトを調整しているため、その他の言語(アプリケーション)では機能しないので注意してください。
ではまず、実際のアプリケーションを確認してください。
このように、塗り潰された「丸」「四角」「星」をそれぞれ描画するボタンを設置し待てみました。
今回はこれらの図形だけですが、直線を組み合わせることによって、様々な描画ができるので活用してみてください。
ではまず、xibファイルを作成していきましょう。
xibファイルを作成
今回設置したオブジェクトはこちら…
・描画位置を設定するCustomView
・描画処理を開始するButton
今回は「丸」「四角」「星」の3つなので、CustomViewとButtonを3つ設置しましょう。

このようになりました。
ここで、設置したボタンのタイトルを、それぞれ「Circle」「Rect」「Line」に変更しておいてください。
後ほど紹介するコード内で、タイトルごとにボタンを判定しているため、ボタンのタイトルとコードの処理名を合わせないとエラーになります。
では続いて、コードからボタンを押した時に図形を描画するというような処理を記述していきましょう。
丸を描画
SwiftのNSGraphicsContextを使って丸を描画する時に重要なコードが以下になります。
class DrawCircle: NSView{
    override func draw(_ dirtyRect: NSRect) {

        let context = NSGraphicsContext.current()?.cgContext
        NSColor.blue.set()
        context?.setLineWidth(3.0)
        context?.addEllipse(in: dirtyRect)
        context?.fillPath()
    }
}
このようなコードをNSViewのサブクラスとして実装する必要があります。
まず、contextにNSGraphicsContextのコンテキストを設定しておきましょう。
続いて、NSColorを設定して描画される図形の色を選んでください。
この項目は好きな色で構いません。
dirtyRectはNSViewクラスのメソッドdraw()の引数にある「dirtyRect」なので、引数名を変更した場合は記述が変わります。
これで、丸を描画する準備ができたので、最後に「fillPath」で塗りつぶしを設定しました。
もし、描画する図形を塗りつぶしではなく、枠線のみにしたい場合は「strokePath()」にすれば実装できるかと思います。
これで、図形を描画する処理ができたので、ボタンをクリックした時の処理を記述しましょう。
xibファイルで作成した「ボタン」をまとめてAction接続してください。
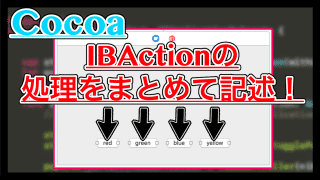
こちらのアクション接続をまとめて登録する方法を使うと、コードの見た目がよくなるので、覚えておきましょう。
アクション接続の中には「描画する位置」を設定し、カスタムビューのサブビューを追加しています。
こちらの説明は「四角」「星」の処理をする時も同様の記述をするのですが、後ほど紹介するコードでは省略するので注意してください。
最終的に以下のようなコードになりました。
import Cocoa

@NSApplicationMain
class AppDelegate: NSObject, NSApplicationDelegate {

    @IBOutlet weak var window: NSWindow!

    @IBOutlet weak var circleCustomView: NSView!
    func applicationDidFinishLaunching(_ aNotification: Notification) {
        // Insert code here to initialize your application

        circleCustomView.layer?.borderWidth = 2
        rectCustomView.layer?.borderWidth = 2
        lineCustomView.layer?.borderWidth = 2

        circleCustomView.layer?.borderColor = NSColor.black.cgColor
        rectCustomView.layer?.borderColor = NSColor.black.cgColor
        lineCustomView.layer?.borderColor = NSColor.black.cgColor

    }

    func applicationWillTerminate(_ aNotification: Notification) {
        // Insert code here to tear down your application
    }
    @IBAction func pushButton(_ sender: NSButton) {

        var views = NSView()

        switch sender.title {
        case "Circle":

            views = DrawCircle(frame: NSRect(x: 5, y: 5, width: circleCustomView.bounds.width - 10, height: circleCustomView.bounds.height - 10))
            circleCustomView.addSubview(views)

            break
        case "Rect":

            views = DrawRectangle(frame: NSRect(x: 5, y: 5, width: rectCustomView.bounds.width - 10, height: rectCustomView.bounds.height - 10))
            rectCustomView.addSubview(views)

            break
        case "Line":

            views = DrawLine(frame: NSRect(x: 5, y: 5, width: lineCustomView.bounds.width - 10, height: lineCustomView.bounds.height - 10))
            lineCustomView.addSubview(views)

            break
        default:
            break
        }
    }
}
class DrawCircle: NSView{
    override func draw(_ dirtyRect: NSRect) {

        let context = NSGraphicsContext.current()?.cgContext
        NSColor.blue.set()
        context?.addEllipse(in: dirtyRect)
        context?.fillPath()

    }
}
カスタムビューの枠線や、他の図形のアクション処理については、先に記述しておいても良いかもしれませんね。
これで実行してみると、ボタンをクリックした時に丸が描画されるアプリケーションが完成したかと思います。

四角を描画
四角を描画する場合、先ほどの丸を描画した時と似たコードで実装することができます。
以下のようなCustomViewのサブクラスを作成しましょう。
class DrawRectangle: NSView{
    override func draw(_ dirtyRect: NSRect) {
        let context = NSGraphicsContext.current()?.cgContext
        NSColor.green.set()
        context?.addRect(dirtyRect)
        context?.fillPath()
    }
}
丸の時とコードが似ているので、詳しい説明は省きますが「context?.addRect(dirtyRect)」でビューの大きさで四角を描画することができます。

クラス名は、Action接続で指定した名前と同じにしてください。
また、Action接続には先ほど紹介したような処理が記述されていることを確認しましょう。
星を描画する
最後に星を描画する方法です。
丸や四角の時と違い、星を描画するときは「直線を組み合わせて」描画してみました。

見た目は図形として描画されていますが、実際には「5本の直線」です。
では実際のコードを確認してください。
class DrawLine: NSView{
    override func draw(_ dirtyRect: NSRect) {
        let context = NSGraphicsContext.current()?.cgContext
        NSColor.yellow.set()
        context?.move(to: CGPoint(x: 0, y: dirtyRect.height/4 * 2.5))
        context?.addLine(to: CGPoint(x: dirtyRect.width, y: dirtyRect.height/4 * 2.5))
        context?.addLine(to: CGPoint(x: dirtyRect.width/4 * 0.75, y: 0))
        context?.addLine(to: CGPoint(x: dirtyRect.width/2, y: dirtyRect.height))
        context?.addLine(to: CGPoint(x: dirtyRect.width/4 * 3.25, y: 0))
        context?.closePath()

        context?.fillPath()
    }
}
このように、これまで紹介してきたコードとは雰囲気が変わっていると思います。
コンテキストを指定して、色を設定するところまでは同じなのですが、moveとaddLineに着目してください。
まずcontext?.move(to: )ですが、こちらは「直線の開始位置(座標)を設定する」記述です。
つまり、今回の場合であれば星の左側になります。

この尖った部分が開始位値ですね。
続いて「addLine(to: )」を使って、次の座標を設定しています。
2番目の点は、開始位置からまっすぐ右に伸びる直線、3番目は星の左下というような具合に、それぞれ座標を設定していきましょう。
順番に座標を設定していき、最後に「closePath( )」を呼び出しています。
この記述は、読んで字のごとくなのですが「パスを閉じる」コードです。
ここまでの座標を確認するとわかるのですが、1本直線が足りませんよね。
ここでclosePathを使うことで「開始位値と現在位置をつなぐ直線」のパスを設定できるようになります。
これで、星のパスが完成したので、あとは「fillPath( )」か「strokePath( )」を呼び出せば実際に描画できます。
まとめ
今回紹介したNSGraphicsContextを使うことで、View上に図形を描画できるようになりました。
同様のコードを使うことで、お絵かきツールなども作成できるかもしれませんね。
今回完成したコードの最終系は以下になります。確認してください。
import Cocoa

@NSApplicationMain
class AppDelegate: NSObject, NSApplicationDelegate {

    @IBOutlet weak var window: NSWindow!

    @IBOutlet weak var circleCustomView: NSView!
    @IBOutlet weak var rectCustomView: NSView!
    @IBOutlet weak var lineCustomView: NSView!

    func applicationDidFinishLaunching(_ aNotification: Notification) {
        // Insert code here to initialize your application

        circleCustomView.layer?.borderWidth = 2
        rectCustomView.layer?.borderWidth = 2
        lineCustomView.layer?.borderWidth = 2

        circleCustomView.layer?.borderColor = NSColor.black.cgColor
        rectCustomView.layer?.borderColor = NSColor.black.cgColor
        lineCustomView.layer?.borderColor = NSColor.black.cgColor
    }

    func applicationWillTerminate(_ aNotification: Notification) {
        // Insert code here to tear down your application
    }
    @IBAction func pushButton(_ sender: NSButton) {

        var views = NSView()

        switch sender.title {
        case "Circle":

            views = DrawCircle(frame: NSRect(x: 5, y: 5, width: circleCustomView.bounds.width - 10, height: circleCustomView.bounds.height - 10))
            circleCustomView.addSubview(views)

            break
        case "Rect":

            views = DrawRectangle(frame: NSRect(x: 5, y: 5, width: rectCustomView.bounds.width - 10, height: rectCustomView.bounds.height - 10))
            rectCustomView.addSubview(views)

            break
        case "Line":

            views = DrawLine(frame: NSRect(x: 5, y: 5, width: lineCustomView.bounds.width - 10, height: lineCustomView.bounds.height - 10))
            lineCustomView.addSubview(views)

            break
        default:
            break
        }
    }
}
class DrawCircle: NSView{
    override func draw(_ dirtyRect: NSRect) {

        let context = NSGraphicsContext.current()?.cgContext
        NSColor.blue.set()
        context?.addEllipse(in: dirtyRect)
        context?.fillPath()

    }
}
class DrawRectangle: NSView{
    override func draw(_ dirtyRect: NSRect) {
        let context = NSGraphicsContext.current()?.cgContext
        NSColor.green.set()
        context?.addRect(dirtyRect)
        context?.fillPath()
    }
}
class DrawLine: NSView{
    override func draw(_ dirtyRect: NSRect) {
        let context = NSGraphicsContext.current()?.cgContext
        NSColor.yellow.set()

        context?.move(to: CGPoint(x: 0, y: dirtyRect.height/4 * 2.5))
        context?.addLine(to: CGPoint(x: dirtyRect.width, y: dirtyRect.height/4 * 2.5))
        context?.addLine(to: CGPoint(x: dirtyRect.width/4 * 0.75, y: 0))
        context?.addLine(to: CGPoint(x: dirtyRect.width/2, y: dirtyRect.height))
        context?.addLine(to: CGPoint(x: dirtyRect.width/4 * 3.25, y: 0))
        context?.closePath()

        context?.fillPath()
    }
}
ぜひ活用してみてください。
ではまた。